NEXT: Hardware: Building >>
***************************************
Below is a list of parts. I hope I am not forgetting anything, otherwise you’ll probably need to go back to the stores and leave me a comment. If this happens do let me know to update this tutorial and for your comment to guide someone else that decides to embark in the project. Prices are approximate and I this time I include brands and models as this might be helpful for you. Do go over the building part before you buy all this stuff to make sure you have enough of everything and understand where to cut things if you can cut them in the stores.
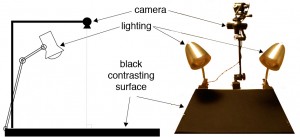 As mentioned elsewhere the MANO controller is a black surface with a camera and some lights. So you need to buy:
- a piece of wood: Proportions are 4:3 just like with TV and perhaps you might want to consider something slightly bigger on the 3 side if you want to give it a small margin at the top. I’ll measure the exact size when I am back in front of it next month.
- black fabric: you need a fabric that absorbs light instead of reflecting it, so velvet sounds like an option. I don’t exactly know what fabric I actually have. Then you need to cover the wood with the fabric and sow it so that it doesn’t fall. Let’s say this will cost 20$ and this might be guessing a bit higher.
You need to go online or find a store that sells manfrotto equipment. This is I think some of the best equipment, but someone else may provide a better solution. As we will see in the building and calibration sections, the challenge is to get a camera holding system that achieves the most consistent positioning over time.
We need two things from them:
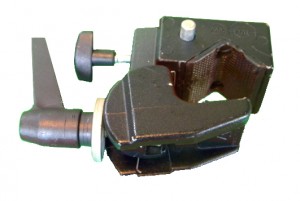
- A “Super-Clamp” (figure 2 – about 20$)
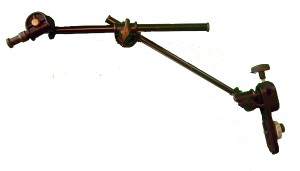 A “2-Section Single Articulated Arm w/Camera Bracket” (figure 3 – about 40$)
I don’t have specific model numbers. Total cost of this step is about 60$.
The next stop is at any electronics store or amazon if available, to buy a webcam. The camera that I am using is a Playstation Camera called PS3eye which I use ob ubuntu with GUVCview. Unfortunately the mac “macam” driver is now outdated and it is difficult to control robustly. The reason why I use this camera is that it can achieve more than 30fps (actually up to 120fps) at 320×240 resolution for a price of $40 at stores (if you can still find it) and around 18$ at amazon. The image quality is great for our purposes.
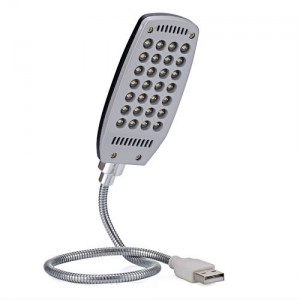 You will also need some kind of system to illuminate the board. I use four of these 28-LED USB powered lamps (as opposed to the big incandescent lamps in the picture above). Buy a couple more in case some of them break. Only one out of six has broken in a couple years.
Precisely because I use four of these USB lamps, you’ll need a four port usb hub. Make sure all ports are facing the same way and it will be easy to wrap the articulated arm with these flexible lamps.
Finally, it is a good thing to have some USB extender cables so you can make the camera and usb hub reach your computer.
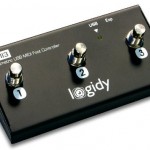 Optionally, you can get a couple pedals to control the instrument, which my patches use. I use this really nice USB MIDI pedal by Logidy, and an expression pedal of some sort.
***************************************
NEXT: Hardware: Building >>
